This piece was the final project for my computer-aided product realization class. I was taught how to operate a HAAS CNC, and learned how to use CAM. I learned a lot about how different mill tools could produce different geometries, and found more tools to use when thinking of design.
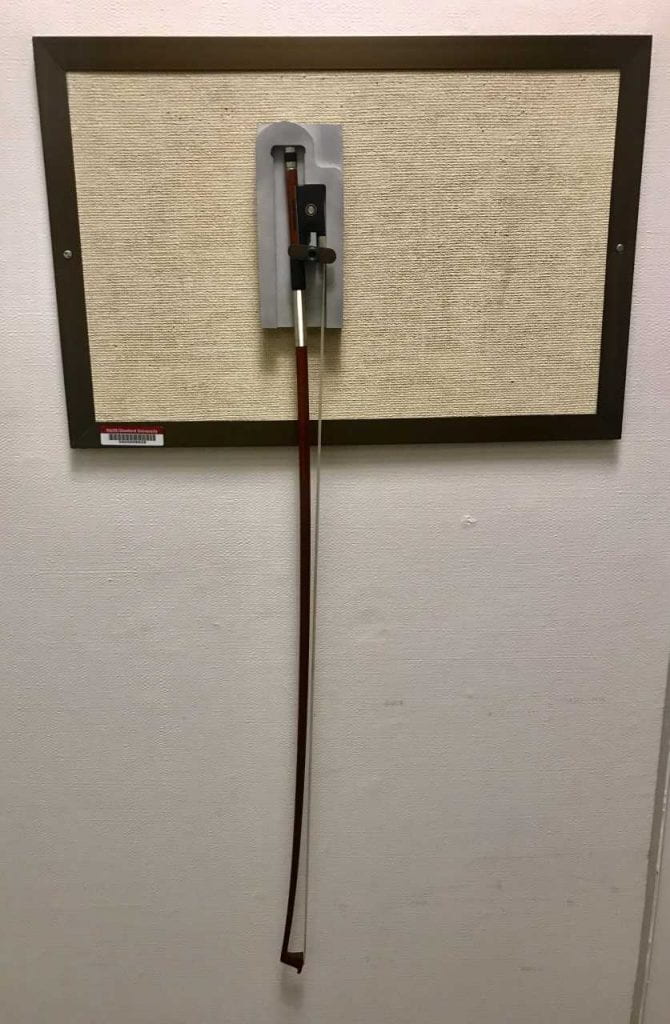
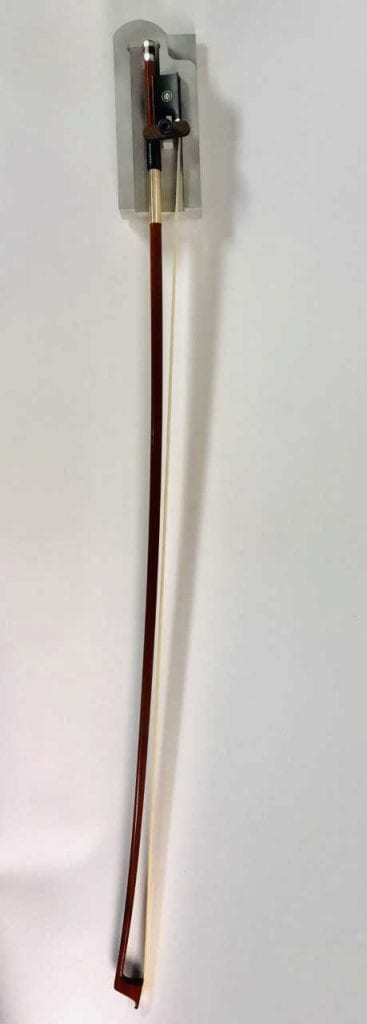
When I was approaching this project, I wanted to address something I found frustrating and ideate on possible solutions to it. I play the violin and I have a case that holds my instrument, my bow, and my shoulder rest. When putting my bow back into the case, I always have to kneel on the ground. I would start off by placing the bow’s tip in the bottom slot and make sure it was lined up with the swivel mechanism at the other end, and then lock it in place from the bottom, a feat that is more time consuming than putting the violin in the case. Taking this small annoyance as a basis for my creative design, I thought of how I could solve it, and was inspired by the little swiveling mechanism inside my case. I thought this mechanism was a very smart way to keep the bow in place and keep it from falling out when being carried and moved around. With this in mind, I decided that I wanted to create a holder for my bow. I would use the general principle of the swivel inside my case and then combine it with a vertical piece that would hang elegantly on my wall.
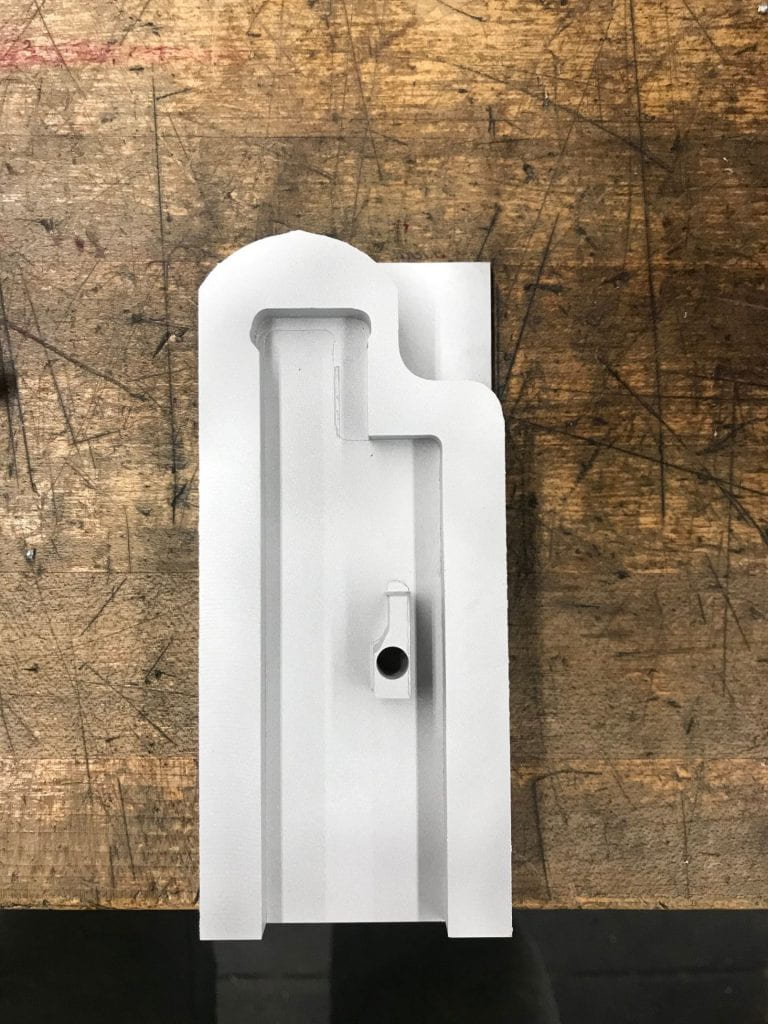
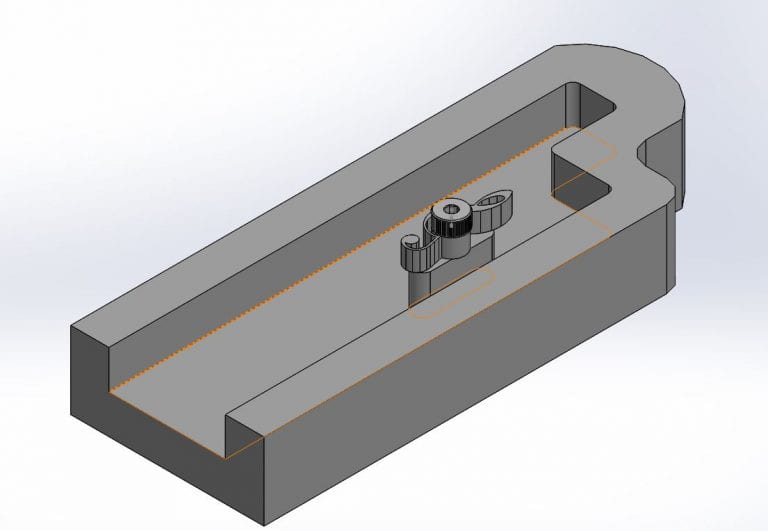
Design Process: Initially, my first design was very blocky, so I tried finding a way to change the geometry to make it a little more dynamic. In the second design, I decided to make the outside of the holder mimic the general shape of the bow, but in a more rounded fashion to balance out the sharpness of the model. I also decided to have a small cut extrude inside the model that would be in the shape of the bow, giving it a snug appearance.
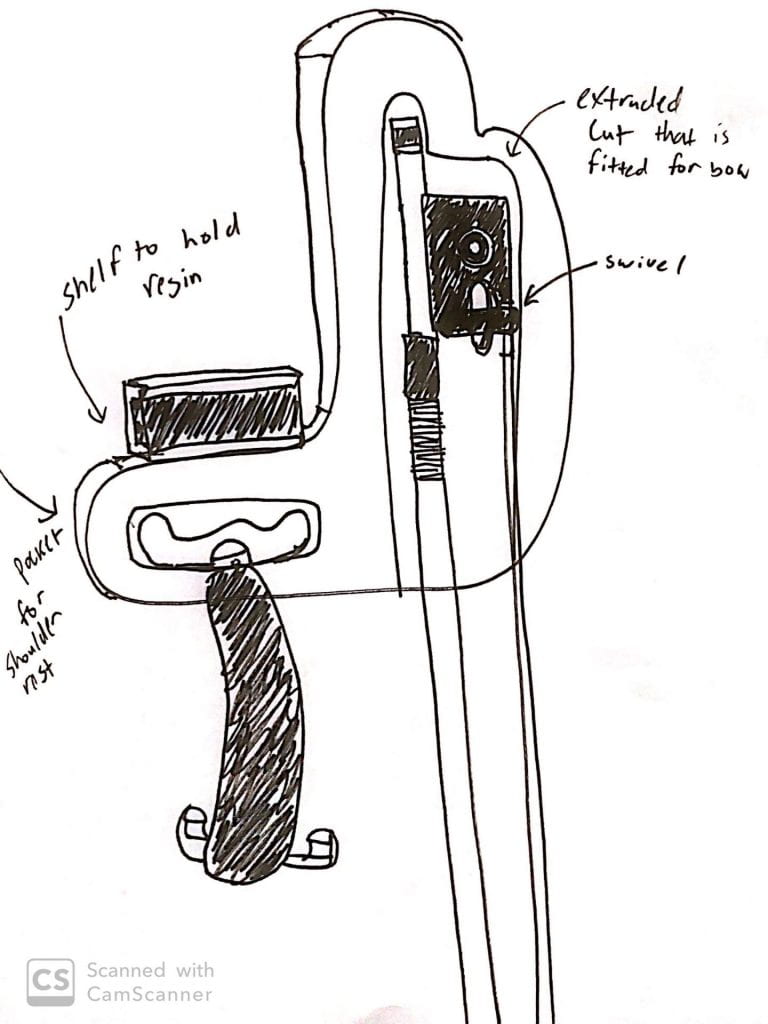

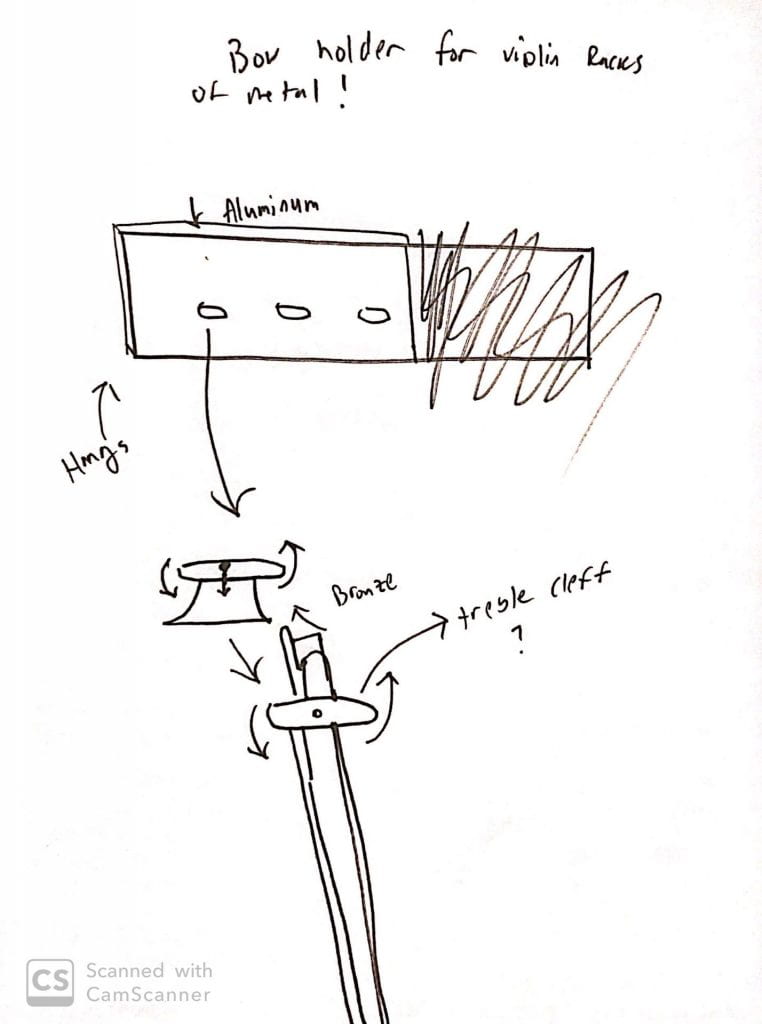
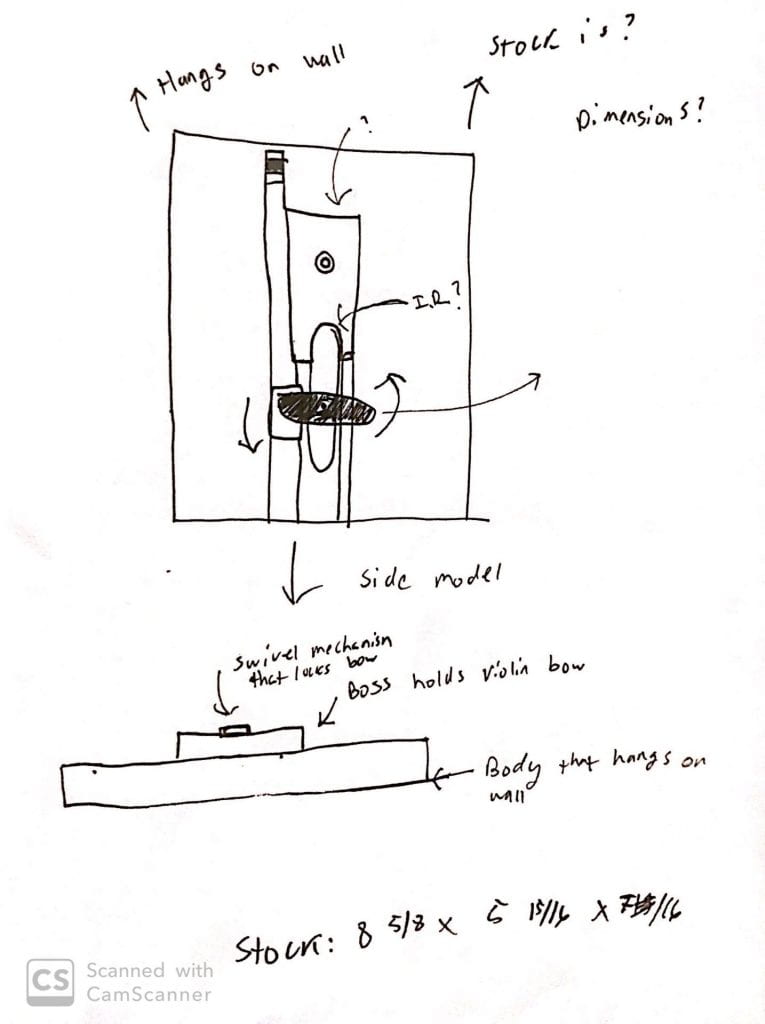
I then started thinking about how I wanted everything to interface. How would the piece hang on the wall? How would the swiveling mechanism work? For the wall hanging, I took inspiration from clocks and their “key” hole pattern. I added two of these in my design to help with balance and stability. For the swiveling mechanism, I only needed three parts. The first would be a threaded hole base where the bow would hang off of, the second would be a shoulder screw that screwed on to the base, and the third a top layer that rotated in order to lock the bow in place and allow it to leave.
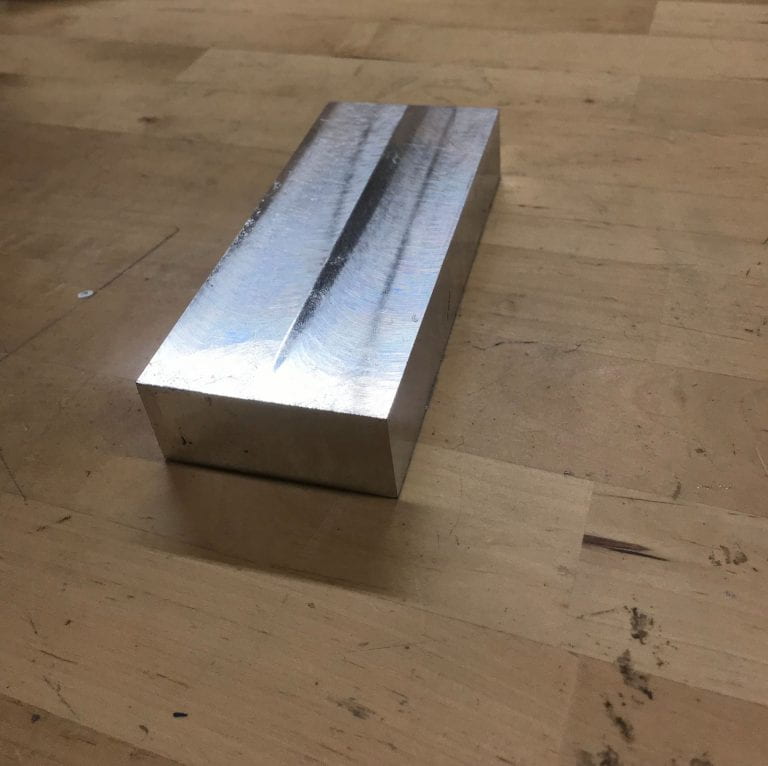
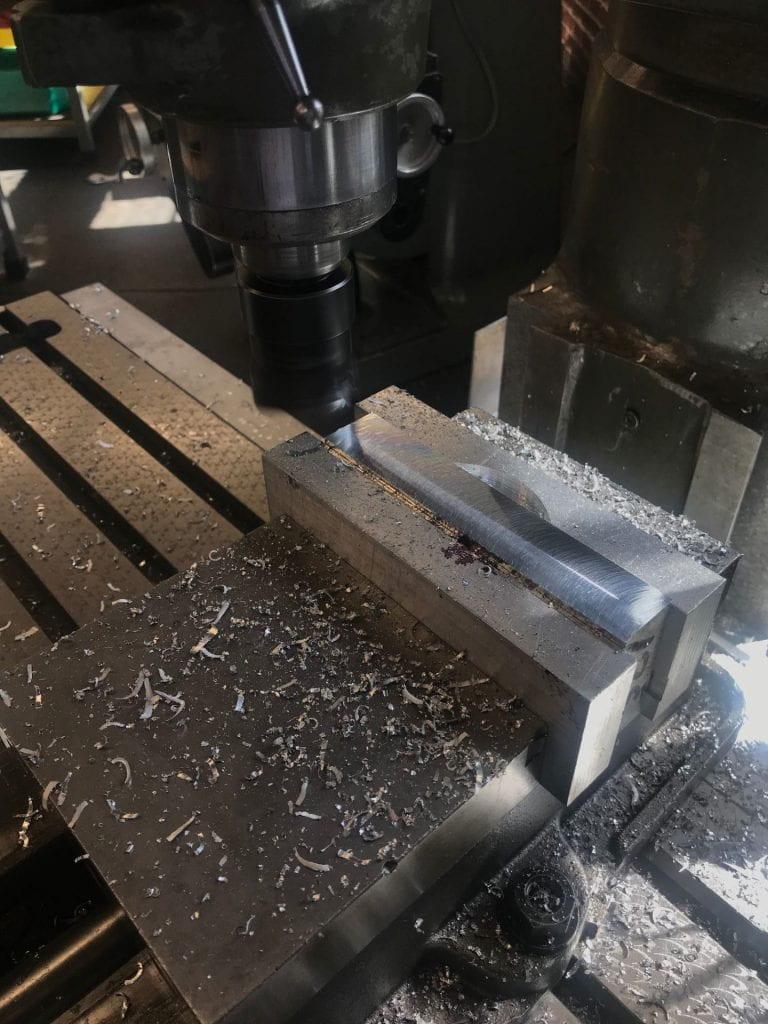
Machining: I started off with a 1.5×6.5×2.5 piece of aluminum stock and proceeded to face it in order to get it closer to the model’s actual dimensions.
After the aluminum stock was ready, I hopped on the CNC and started my program. After the program finished running, I discovered that there were a lot of burs on the sides and it looked like the end mill did not properly cut into the material. I discovered that I had accidentally used a 1/4 inch non-center cutting end mill instead of the regular one, so it had issues cutting in the Z direction.
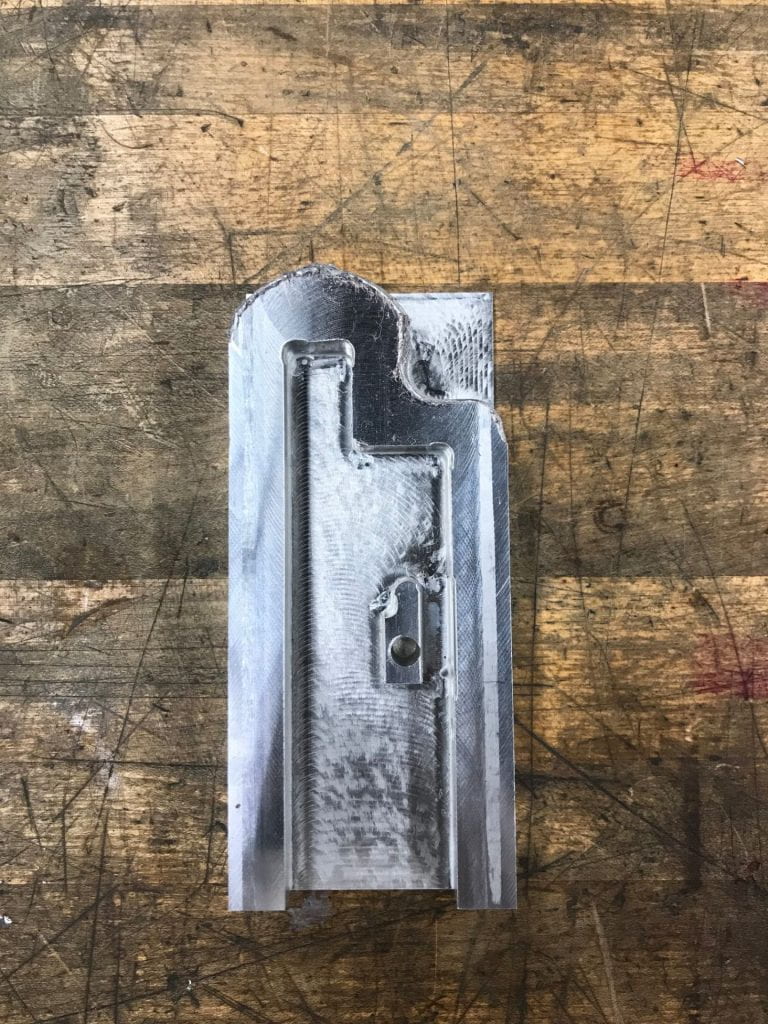
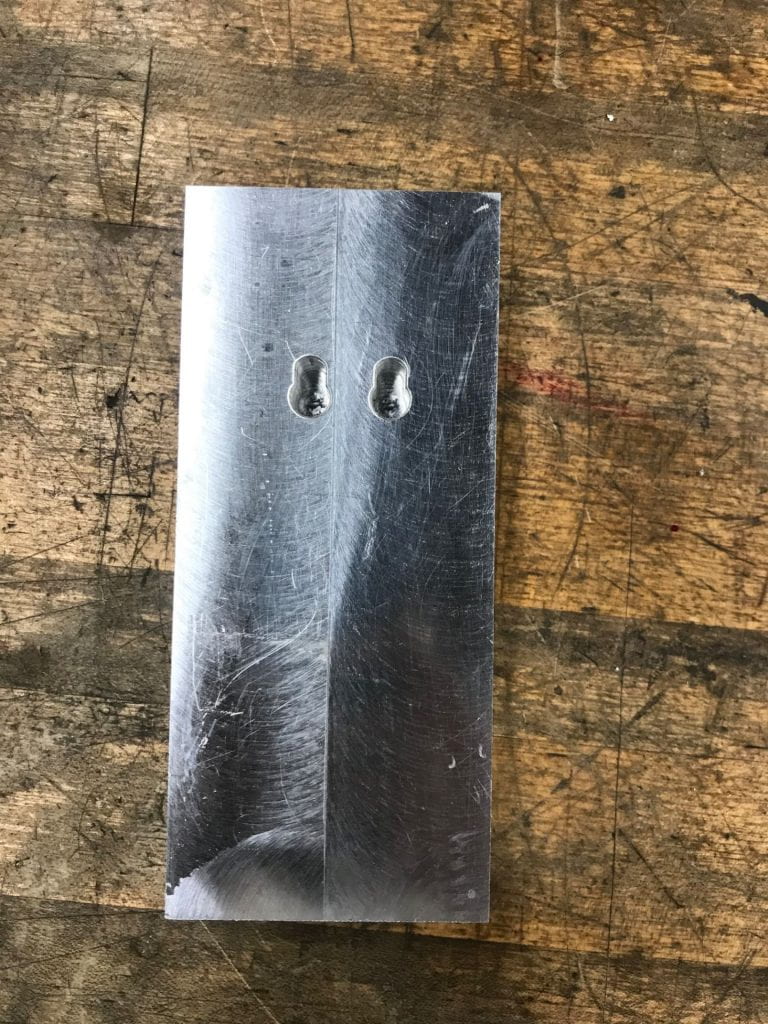
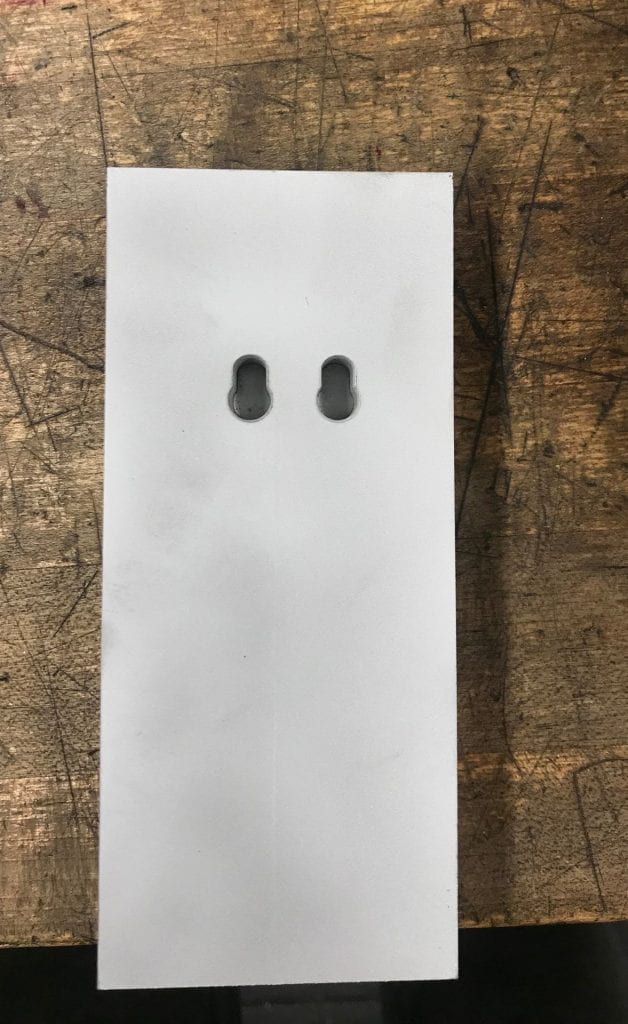
After this I loaded up my second tools and programs and started my part flip. After I finished the part flip, I went to a manual mill and used a shell mill to face off the top layer of my part in order to remove the burs from the first job. Luckily, the walls of the model weren’t important to the functionality of the holder and I was able to shave off a couple thousands of an inch. After this, I decided to sand blast the machined metal to give it a texture that would not color clash with the bow.
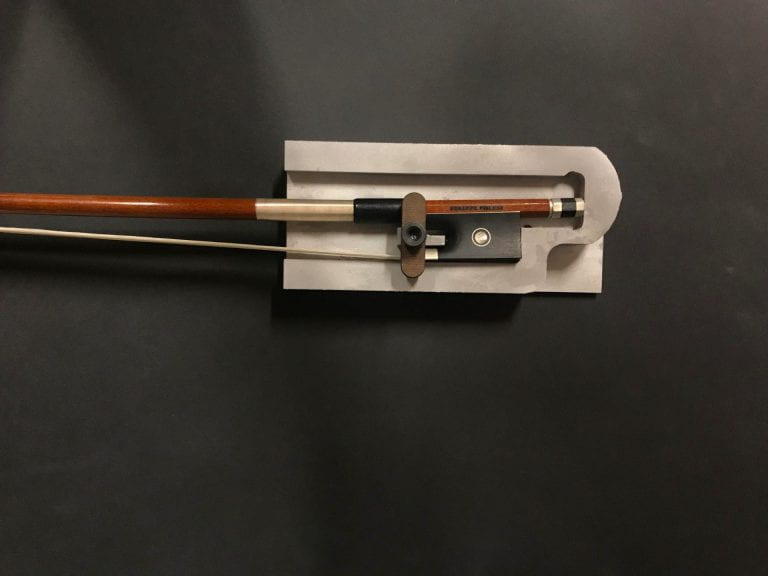
Finally, I laser cut a piece of Duron into the small shape I made in CAD with the exact hole diameter of the shoulder screw, then put it on the model and screwed it in with the shoulder screw, and voilà It was ready to start holding my bow!
Time management was something I struggled with during my project. I would have liked to do a lot more with my final design and completely eliminate the case so that the holder could hold everything except my violin, but this would have added more complexity to work holding, and I did not have the time to figure this out. However, I did create a model that included a shelf where the bow resin could rest as well as a pocket underneath that would allow for the shoulder rest’s claws to grip on to it. I know that any good designer needs time to iterate and improve during the design process, and my time constraint severely limited what I could accomplish.

I would have also liked to flesh out the aesthetic components of my design more by using my original design for the swivel mechanism: a small treble clef. I would have liked to implement a lot more things to my holder that would’ve added to the musicality aspect, keeping the theme and making it a bit more creative, but again the time constraint was difficult to work around.
One of the biggest lessons I learned was how to approach issues using lateral thinking. I initially wanted to make a shoulder rest for my final project, but I didn’t know how I could make it personal or more interesting. So, instead of limiting myself to making something I already had, I decided to make a list of topics that I liked in order to get an idea of how I could create something a little more unique. I then listed the things I liked about them, and the things I disliked about them and started fleshing out some of the ideas and figuring out how I could solve them, and this led me to my bow holder.
Another important takeaway I gained from this class is that communicating is essential to the design process. It is easy to get clouded by your own judgements and get stuck looking at one thing. My professor's advice on lateral thinking was what led me to my bow holder idea, and I don’t think I would have thought of it if I had continued thinking linearly. ME 128 taught me a lot about the design process, time management, and communication, and I will use these experiences for growth.